 July 22, 2023
 Essential guide to Jupyter notebook
Discover all the essentials of Jupyter Notebook and unlock its full potential. Includes cheatsheet for both Windows & Mac users
In the dynamic world of data science and machine learning, Jupyter Notebook has emerged as an indispensable tool for interactive computing and collaborative data exploration. If you are new to Jupyter Notebook or seeking to enhance your proficiency with this versatile platform, you’ve come to the right place!
This comprehensive guide is designed to introduce you to the fundamentals of Jupyter Notebook and help you harness its full potential. Whether you are a beginner looking to learn the basics of coding or a seasoned data scientist seeking a seamless environment for data analysis and model building, Jupyter Notebook is your go-to companion.
By the end of this exploration, you’ll be equipped with the essential knowledge of the tools used by many data scientists to manipulate data, visualise data and build machine learning models.
Contents
- What is Jupyter Notebook?
- Why you need Jupyter Notebook?
- How to install Jupyter Notebook on Mac & Windows?
- Using Jupyter Notebook?
- Working with Jupyter Notebook?
Let’s dive into the Jupyter Notebook, and understand what it is and why you need it ?
What is Jupyter Notebook?
Jupyter Notebook is a versatile web-based tool that combines coding and writing in one place. It’s like having a notebook where you can write explanations, add images, and also run computer code. This makes it perfect for data analysis, machine learning, and sharing research.
In Jupyter Notebook, you work with cells, and each cell can either have text (like a mini-article) or code (where you run Python, R, or other languages). This interactive approach lets you write, run code, and see the results right away.
Key Features:
-
Easy Text Formatting: You can use simple formatting to create headings, lists, math equations, and more. This helps you write clear explanations and organize your work.
-
Run Code Instantly: With Jupyter, you can run code in separate blocks. This means you can test small parts of your program, check data, and see the output step by step.
-
Visualize Data: Jupyter lets you create graphs and charts directly in the notebook, making it easy to visualize your data and gain insights.
-
Explore Data: Load and play with datasets right in Jupyter. You can analyze data, clean it, and understand it better, all interactively.
-
Collaborate and Share: Jupyter Notebooks are shareable with others. You can work together, get feedback, and share your findings effortlessly.
-
Support for Different Languages: Although it starts with Python, Jupyter can work with other languages too. You can switch to R, Julia, or more, depending on your needs. Full list of available kernels can be found here
Why you need Jupyter Notebook?
Jupyter Notebook provides an intuitive environment for various purposes, making it a powerful and versatile tool for data science and machine learning tasks. Here are some key ways you can leverage Jupyter Notebook:
-
Learning to Code and Debugging: Jupyter Notebook is an excellent platform for beginners to learn coding and debug their programs step-by-step. Its interactive nature allows you to experiment and see the results immediately.
-
Performing Data Analysis: With Jupyter Notebook, you can easily analyze data, manipulate datasets, and perform exploratory data analysis (EDA). Its interactive visualizations help you gain insights into your data.
-
Data Cleaning and Organising: Jupyter Notebook facilitates data cleaning and organization tasks, enabling you to prepare data for further analysis and modeling.
-
Data Visualization: Create stunning visualizations directly within Jupyter Notebook using libraries like Matplotlib and Seaborn. Visualizing data helps in better understanding patterns and trends.
-
Building Machine Learning Models: Jupyter Notebook is widely used for machine learning experiments. You can develop, test, and fine-tune machine learning models right in the notebook.
And many more possibilities await! One of the standout features of Jupyter Notebook is its collaboration capabilities. You can easily share your notebooks with fellow researchers, developers, and the open-source community.
Due to its popularity and usefulness, many technology companies offer their own versions of Jupyter Notebook on their cloud platforms. For example Google Collaboratory, Microsoft’s Azure Notebook and Amazon’s Sagemaker Notebook provide cloud-based Jupyter environments for seamless collaboration and computation.
How to install Jupyter Notebook on Mac & Windows ?
To install Jupyter Notebook on Mac or Windows, make sure you have Python 3.X installed.
Here are the step-by-step instructions:
- First, ensure you have the latest version of pip by running the following command in your terminal or command prompt:
pip3 install --upgrade pip(Note: If you’re using Windows, you can use pip instead of pip3 in the commands.)
- Install Jupyter Notebook by executing the following command:
pip3 install jupyter- Once the installation is complete, you can run the notebook using the command:
jupyter notebookThe Jupyter server will start, and the Notebook dashboard will open in your default web browser.
To shut down the Jupyter server, press Ctrl + c on your terminal or command prompt.
Using Jupyter Notebook?
You have already seen the first basic command for running the notebook server:
jupyter notebookThe Notebook server runs on port 8888 by default, and it will open the Notebook dashboard in your default web browser.
The Notebook dashboard displays a list of files, subdirectories, and Notebook documents (if present) in the directory where the notebook server was started.
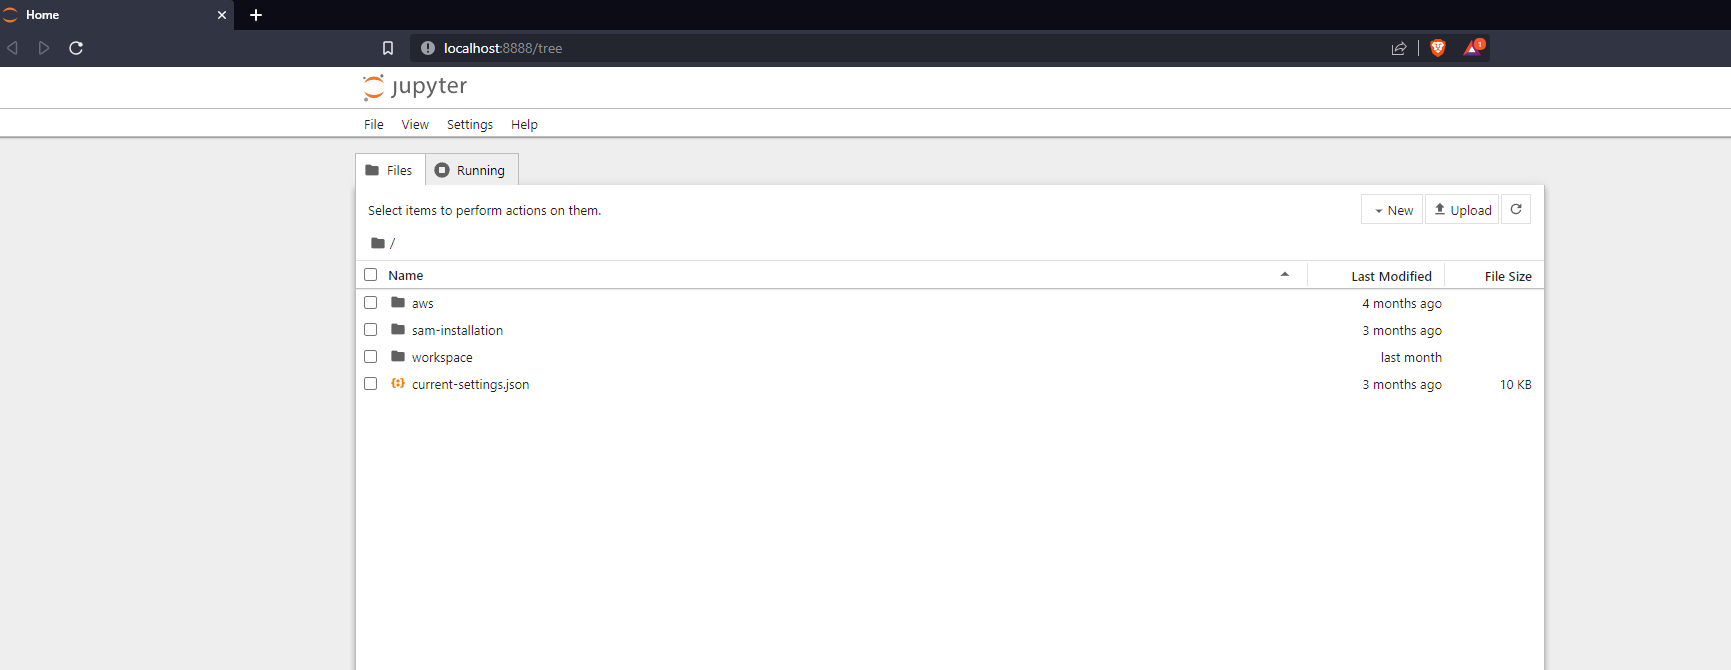
To organize my work, I usually create a dedicated workspace directory that houses all the Notebook documents and start the notebook server from there.
There are options to customize the behavior of the Notebook server, and I will list out the essential ones:
-
To open a specific Notebook document, you can run the following command:
jupyter notebook notebook.ipynbAs you notice, the file extension of a notebook document is
.ipynb -
To run the Notebook server on a specific port, use the following command:
jupyter notebook --port 9999 -
To run the Notebook server without opening the Notebook dashboard in your default browser, use this command:
jupyter notebook --no-browser -
To execute a Notebook document from your terminal, use the
runsubcommand and pass the Notebook document file:jupyter run notebook notebook.ipynb
Working with Jupyter Notebook?
The Jupyter Notebook interface is simple to use. If you have ever used a word processor like MS Word or LibreOffice Writer, you will find that the interface looks somewhat similar. There are two prominent tabs that might be new to you:
- Cell: This is a container for the code to be executed or the rich text to be displayed.
- Kernel: This is the computational engine that executes code in the Notebook document.
A cell can contain code to be executed in the Kernel, and we call this type of cell a Code Cell. On the other hand, we use Markdown format to write rich text to be displayed in a cell, and hence we call this type of cell a Markdown Cell.
When working with a cell, you will usually toggle between 2 modes:
- Command mode: The cell will have a blue outline border, indicating that the cell has been executed or is ready to execute.
- Editing mode: The cell will be highlighted with a green outline border, indicating that you can edit the cell’s contents.
To toggle between Editing and Command mode, use the ESC and Enter keys respectively.
To run a cell, use Command + Enter on Mac and Ctrl + Enter on Windows.
Keyboard shortcuts are a very popular aspect of Jupyter Notebook. Besides the foundational shortcuts we discussed, there are many more available. I have compiled an essential list of keyboard shortcuts for both Mac and Windows users.
Jupyter Notebook Shortcuts for Mac users
| Shortcut | Description |
|---|---|
Enter | Enter edit mode |
Shift + Enter | Run cell and select below |
Command + Enter | Run cell |
Shift + Tab | Show tooltip |
Esc | Command mode |
h | Show keyboard shortcuts |
y | Change cell to code |
m | Change cell to markdown |
a | Insert cell above |
b | Insert cell below |
x | Cut selected cell |
c | Copy selected cell |
v | Paste cells below |
d + d | Delete selected cells |
z | Undo last cell delection |
l | Toggle line numbers |
o | Toggle output |
Shift + Up | Select multiple cells |
Shift + Down | Select multiple cells |
Shift + M | Merge selected cells |
Command + s | Save and checkpoint |
Command + Shift + s | Save and checkpoint as |
Command + Shift + - | (- is minus) Split cell at cursor |
Command + a | Select all cells |
Command + z | Undo last action |
Command + y | Redo last action |
Command + c | Interrupt kernel |
Command + f | Find and replace |
Command + Shift + f | Find and replace in all notebooks |
Command + L | Clear output |
Alt + Up | Move current cell up |
Alt + Down | Move current cell down |
Jupyter Notebook Shortcuts for Windows users
| Shortcut | Description |
|---|---|
Enter | Enter edit mode |
Shift + Enter | Run cell and select below |
Ctrl + Enter | Run cell |
Shift + Tab | Show tooltip |
Esc | Command mode |
h | Show keyboard shortcuts |
y | Change cell to code |
m | Change cell to markdown |
a | Insert cell above |
b | Insert cell below |
x | Cut selected cell |
c | Copy selected cell |
v | Paste cells below |
d + d | Delete selected cells |
z | Undo last cell delection |
l | Toggle line numbers |
o | Toggle output |
Shift + Up | Select multiple cells |
Shift + Down | Select multiple cells |
Shift + M | Merge selected cells |
Ctrl + s | Save and checkpoint |
Ctrl + Shift + s | Save and checkpoint as |
Ctrl + Shift + - | (- is minus) Split cell at cursor |
Ctrl + a | Select all cells |
Ctrl + z | Undo last action |
Ctrl + y | Redo last action |
Ctrl + c | Interrupt kernel |
Ctrl + f | Find and replace |
Ctrl + Shift + f | Find and replace in all notebooks |
Ctrl + L | Clear output |
Alt + Up | Move current cell up |
Alt + Down | Move current cell down |
Conclusion
In conclusion, Jupyter Notebook is a valuable tool for various tasks, loved by data scientists, developers, and researchers. Its user-friendly interface, similar to word processors, makes it easy for everyone to use.
Now, armed with the knowledge of commands and shortcuts, you can confidently explore the world of Jupyter Notebook for your data-driven projects.
Embrace the power of Jupyter Notebook and enjoy coding and exploring!